



Canopy Tents
Vendor Tent Ideas: 15 Booth Setups That Pull Shoppers In
Walk through any outdoor market, craft fair, or festival and you will notice something quickly — some booths draw a crowd while others sit nearly empty. The difference almost always comes down to setup, not product. If you are searching for vendor tent ideas that actually convert foot traffic into sales, this guide breaks down 15 proven booth configurations, the gear that makes each one work, and the small decisions that separate a forgettable stall from a destination.

Why Your Booth Layout Matters More Than Your Product (At First)
Shoppers make a split-second decision about whether to step inside your space. Your canopy, signage, table arrangement, and overall visual story are doing the selling before a single word is spoken. A well-executed vendor tent setup signals professionalism, invites curiosity, and guides a stranger’s eyes toward your best items.
Before diving into specific configurations, two things should be locked in:
- Your tent size — most vendor events offer 10′ x 10′ spaces, but some allow 10′ x 20′ or corner spots.
- Your brand colors and logo — these need to be on the canopy roof, at minimum, so your booth is recognizable from a distance.
If you are still choosing your tent, our complete guide to custom canopy tents covers every size, frame type, wall option, and print finish in detail — a smart starting point before committing to a layout.
15 Vendor Tent Ideas by Booth Goal

The ideas below are organized by the primary outcome each setup is designed to achieve. Mix and match elements across categories to fit your product and event type.
Setups Designed to Maximize Visibility
1. Full-print canopy with contrasting sidewalls
Print your entire canopy roof in your brand color and add two half-walls in a complementary contrast color. The roof is visible from across the venue; the walls frame your space and block wind for displayed products.
2. Tall banner towers at both front corners
Pair your canopy with two retractable banners positioned just outside the front legs. Height draws the eye upward and outward, pulling attention from farther away. If you want to understand the full range of banner stand options, the retractable banner stand buying guide walks through every format and material.
3. Lighted canopy with LED strip along the valance
Battery-powered LED strips clipped to the inside valance edge create warm, even light that makes your booth pop at dawn markets or evening events. Combine with a white or light-colored canopy interior for maximum reflection.
4. Elevated brand element — a fabric arch or tower
Fabric display towers placed inside the tent, visible above the canopy line, add unexpected vertical interest and give your brand a second visual layer. The fabric pop up display guide explains which formats pack down small enough for festival logistics.
Setups Designed to Guide Shoppers Inside
5. The U-shape layout
Place one table along each sidewall and leave the center open. Shoppers walk in naturally, surrounded by product on three sides. This is one of the most popular vendor tent display ideas for jewelry, candles, and small-batch goods because it maximizes display surface without crowding the entrance.
6. The L-shape with a checkout corner
Run tables along the back wall and one sidewall. Position your checkout and packaging station at the back corner. Traffic flows in, circles the product, and naturally arrives at checkout — a logical path that reduces impulse departures.
7. The angled front table
Instead of running your front table parallel to the canopy edge, angle it at 45 degrees. This physically opens the entrance and visually invites passersby to step in rather than just glance from outside.
8. The open front with a focal display piece
Remove the front table entirely. Place a single striking display — a tall shelving unit, a hanging rack, or a branded pedestal — centered in the back of the booth. The open entrance and visual anchor at the back pull people through the threshold.
Setups Designed to Display More Product
9. Multi-level shelving along back wall
Tiered shelves create vertical product real estate in a 10′ x 10′ footprint. Use the bottom shelves for bulk or backup stock and the upper shelves for hero products at eye level.
10. Grid wall panels on tent legs
S-hook grid panels zip-tied to canopy legs turn dead vertical space into display area. This works especially well for bags, hats, scarves, and packaged goods.
11. Hanging display bars across the canopy frame
Clip a hanging bar between two canopy legs across the back or sides. Hang lightweight products, signage, or lighting from it. Always verify your tent frame’s load rating before hanging anything.
12. Folding suitcase displays on tabletop
Compact suitcase-style risers fold flat for transport and open into tiered displays on your tables. They add dimension without taking up additional floor space. Knowing how to fold a canopy tent and take it down without damage is equally important when packing up at the end of a long event day.
Setups for Specific Vendor Types
13. Food vendor open-service layout
For food stalls, the vendor tent setup changes significantly — you need a clear service counter, visible health compliance signage, and safe separation between prep and customer zones. Our dedicated post on food vendor tent setup covers the layout, branding, and safety checklist specific to this use case.
14. Craft fair maker studio setup
Show your process. Place a small worktable or demonstration area at the front where you can be seen working. Finished products display behind you. The “making in public” element is a conversion driver — people who watch you work almost always stop to browse.
15. Direct-sales consultant or service provider
If you sell a service or run product demos, flip the typical layout: two chairs and a small table at the front for consultations, and a display panel or backdrop behind you with your offer and contact details. Standing signage or a pop-up backdrop handles branding so your canopy and body language close the deal.
The Non-Negotiable Setup Details
Even the best vendor tent set up ideas fall apart without these fundamentals in place.
| Element | Why It Matters | Recommended Spec |
|---|---|---|
| Canopy weight / anchoring | Wind can topple an unsecured tent, damaging product and injuring people | 25–40 lbs per leg for a 10′ x 10′ tent in typical outdoor conditions |
| Branded canopy roof | Visibility from 50’+ away | Full-color dye-sublimation print |
| Table height | Comfort for browsing and transaction | Standard 30″ or bar-height 42″ depending on product type |
| Lighting | Vital for indoor venues and shaded spots | Battery LED or clip-on spot lights |
| Checkout zone | Reduces lost sales at payment moment | Clearly marked, stocked with bags and a card reader |
For a deeper look at anchoring requirements by tent size and wind speed, the guide on weight for canopy tent legs gives specific pound recommendations so you can show up to any outdoor event safely. You should also review tips on how to keep a tent from blowing away at outdoor events before heading into a windy venue.
Choosing a Tent That Supports Any of These Layouts
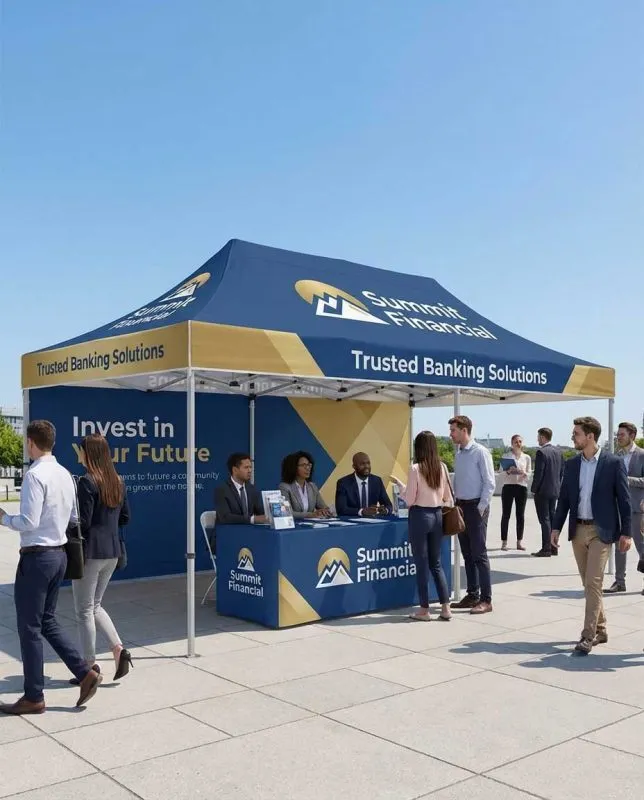
All 15 vendor tent ideas above benefit from a tent frame that is sturdy, quick to set up, and built to carry custom print graphics. The custom pop up tents at Showfire Displays are available in 10′ x 10′, 10′ x 15′, and 10′ x 20′ footprints with options for full walls, half walls, and rail skirts — so you can tailor the enclosure to whichever layout you choose.
If you are also planning to exhibit at indoor trade shows and want a single system that works across both event types, the trade show displays buyer guide is the broadest resource on the site and covers how canopies, banner stands, pop-up displays, and table covers work together as a coordinated system.
Start with One Idea and Refine from There
The most effective vendor booths are not built in a day — they evolve through testing. Pick one of the 15 vendor tent ideas above that fits your product category and current inventory of equipment. Run it at your next event, note what draws people in and what creates hesitation, and make one change at a time.
Small, deliberate adjustments — moving a table a few feet, raising a sign six inches, removing one piece of visual clutter — compound into a booth that feels effortless for shoppers to enter and hard to leave without buying. Your tent is the frame; the ideas above are where you start building.