
Fabric Pop Up Displays
How to Set Up a Fabric Pop Up Display in Minutes
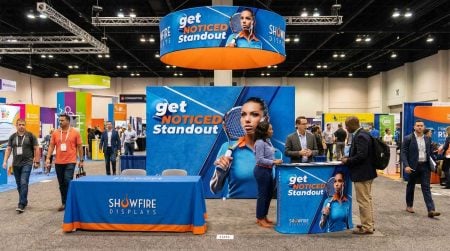
Setting up your booth shouldn’t be stressful. With the right system, you can assemble a professional backwall in under 10 minutes—no tools required. That’s why many exhibitors choose a fabric pop up display for 10×10 trade show booths, conferences, and portable marketing events.
In this guide, you’ll learn step-by-step how to set up your display quickly, how to avoid common mistakes with fabric pop up displays, and how to pack it properly after the event.
Why Fabric Pop Up Displays Are Built for Speed
Modern fabric pop up displays are engineered for efficiency. Unlike older panel systems or complex modular builds, these displays use:
-
- Lightweight aluminum accordion frames
- Push-button locking connectors
- Tension fabric graphics (pillowcase or hook-and-loop)
- Compact travel cases
If you’re preparing for a standard inline booth, most 10ft fabric pop up displays are designed to span the backwall perfectly—making setup simple and predictable.
For smaller events, compact 8ft fabric pop up displays follow the same assembly principles with even lighter frames.
Step-by-Step Setup Guide
Step 1: Unpack and Expand the Frame

Remove the collapsible aluminum frame from the travel bag or case. Place it upright and gently pull outward from both sides.
You’ll notice:
- The frame expands accordion-style
- Connectors align automatically
- Structure begins forming its full width
Make sure the frame is centered in your booth before locking it into position.
Step 2: Lock the Frame Connectors

Most systems include push-button connectors or magnetic locking points.
To secure the frame:
- Press each connector until it clicks
- Confirm the frame is fully extended
- Ensure the base is level
This creates a rigid structure that supports your graphic smoothly.
Step 3: Attach the Fabric Graphic

Depending on your system, the graphic will either:
- Attach using hook-and-loop strips
- Slide over the frame like a pillowcase
- Zip closed at the bottom
For pillowcase-style graphics:
- Pull the fabric over the top of the frame
- Align corners evenly
- Zip or secure the bottom
The tension in the fabric will eliminate wrinkles and create a seamless appearance.
If you need help designing artwork, explore professional trade show booth design strategies to ensure your messaging reads clearly from 15–20 feet away.
Step 4: Add Optional Lighting
To enhance visibility:
- Attach clamp lights to the top frame
- Position lights evenly
- Avoid glare hotspots
While standard fabric systems look professional on their own, some exhibitors eventually upgrade to backlit trade show displays for illuminated graphics and premium visibility.
Common Setup Mistakes to Avoid
Even though setup is simple, avoid these errors:
![]()
Not Fully Expanding the Frame
If the frame isn’t fully extended, graphics may sag or wrinkle.
![]()
Uneven Graphic Alignment
Always align corners before securing fabric to prevent distortion.
![]()
Skipping Level Adjustment
An uneven base can tilt your display and affect visual presentation.
![]()
Overpacking Before Fabric Cools
Allow fabric to relax before folding to reduce creasing.
Proper setup ensures your display looks like one of the most polished portable trade show displays in the exhibit hall.
How Long Does Setup Take?
For most exhibitors:
- 8ft display -> 5–7 minutes
- 10ft display -> 7–10 minutes
- 20ft display -> 10–15 minutes
With practice, setup becomes second nature.
Because these systems are among the most efficient trade show displays, they’re widely used by traveling sales teams and first-time exhibitors alike.
Teardown and Packing Tips

Just as important as setup is proper teardown.
Step 1: Remove Lighting
Detach lights and store separately.
Step 2: Remove Fabric Carefully
If fabric is clean and dry, fold gently. Avoid sharp creases.
Step 3: Collapse the Frame
Press connector buttons and push inward evenly.
Step 4: Store Securely
Place frame and fabric inside travel bag or case.
Proper storage extends the life of your system and preserves print quality.
Travel & Shipping Considerations
One reason exhibitors prefer fabric systems is transportation simplicity.
Benefits include:
- Fits inside most SUVs
- Reduced freight costs
- Lightweight handling
- No specialized installation crew required
Compared to heavier modular exhibit systems, fabric displays are significantly easier to manage.
If you’re evaluating broader options, review the full range of trade show displays to compare portability levels and booth configurations.
When to Upgrade Beyond Fabric
While fabric systems are ideal for most 10×10 spaces, you may consider expanding if:
- You move into 10×20 booths
- You require illuminated graphics
- You want custom reconfigurable layouts
In those cases, premium solutions such as backlit or modular systems may provide additional flexibility.
However, for standard inline exhibits, fabric pop up displays remain the fastest and most efficient solution.
Final Thoughts
If you want a display that sets up quickly, travels easily, and delivers professional branding, fabric pop up systems are hard to beat.
To recap:
- Tool-free assembly
- Lightweight aluminum frame
- Seamless tension fabric
- Compact storage
- Perfect for 10×10 booths
If you’re comparing configurations, be sure to review our guide on single vs double-sided fabric displays to choose the best layout for your event.
With the right preparation, you can arrive at your next trade show confident that setup will be the easiest part of your day.